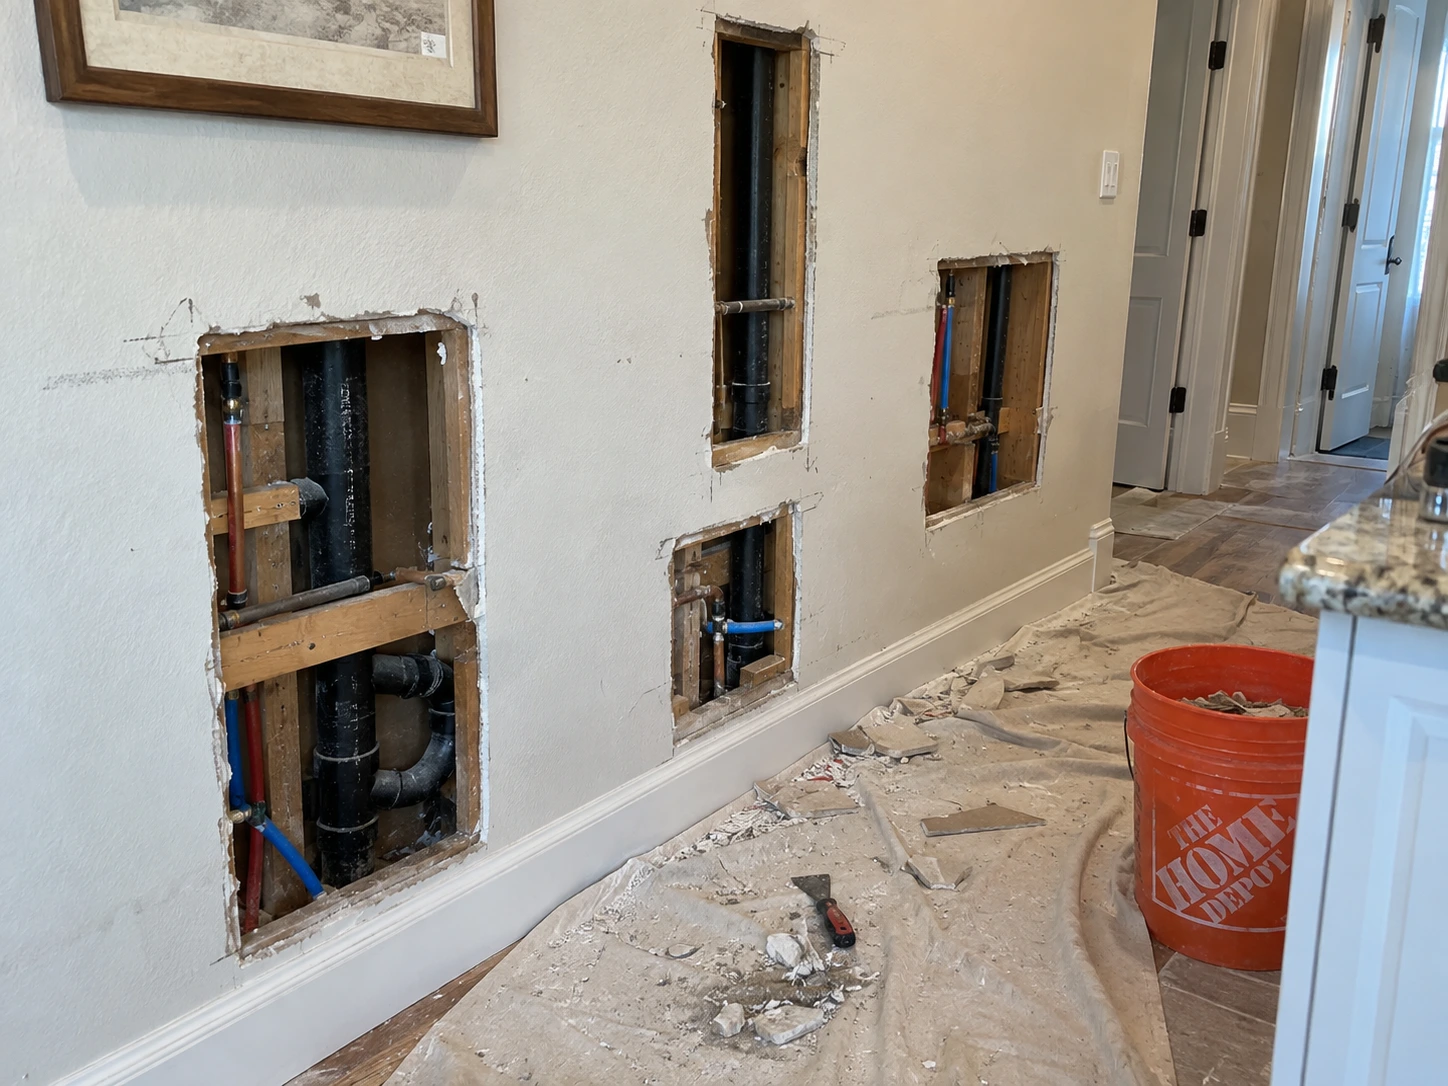
What happens after a plumber opens drywall?
The usual sequence is straightforward, although the details vary by project:
- A plumber or another trade opens the wall or ceiling to reach the work area.
- The plumbing repair, replacement, or repipe is completed.
- One or multiple access openings remain after the trade confirms they are ready to close.
- Backing or support is added as needed and replacement drywall is installed.
- Seams and fasteners are finished and feathered into the surrounding surface.
- The existing texture is matched or blended as closely as practical.
- Primer and paint are addressed according to the agreed scope.
Before closing: Confirm that the plumbing work and any required inspection are complete, the area is dry, and no valve, cleanout, junction, or other component must remain accessible.
Single openings vs. multiple plumbing access holes
A single clean opening may be handled as one localized repair. A repipe or widespread plumbing repair can leave openings in several rooms, at different heights, and on different wall or ceiling surfaces. Each opening adds edges, backing needs, seam finishing, texture transitions, protection, and paint planning. Nearby openings may sometimes be approached as a combined repair area, while separated openings usually require individual preparation and finishing.
Walls and ceilings require different planning
Wall repair is generally easier to access and support during installation. Ceiling repair adds overhead handling, gravity, ceiling height, lighting across the surface, and ceiling-specific texture and paint considerations. Openings below upstairs plumbing or around a leak may also need additional evaluation before they are closed. Review ceiling drywall repair in Orange County.
Backing, support, and insulation
Replacement drywall needs secure support around the repair boundary. Depending on the opening, existing framing may be usable or additional backing may be needed. Insulation that was moved or removed for plumbing access may also need attention before closure when it is part of the wall or ceiling assembly. The drywall scope should not conceal incomplete trade work or required access.
Finishing and feathering the repair
After replacement drywall is secured, tape and joint compound are used to finish seams and fasteners. Feathering extends finish beyond the panel edges to create a smoother transition into the existing surface. Opening size, edge condition, nearby trim, cabinets, corners, and the number of patches influence how much finish area is needed. For related scope factors, see the drywall hole repair guide.
Texture matching after plumbing access
Orange peel, knockdown, smooth finishes, and other textures require different application and blending methods. Existing texture density, previous paint, lighting, and the available transition area affect the result. A close blend may be realistic, but exact invisibility should not be assumed. Learn more about drywall texture matching.
Primer, paint, and blending
New joint compound and replacement drywall normally need suitable primer before finish paint. A spot-painted repair may blend when the existing coating is recent and the color and sheen are known. Older paint, unknown products, strong lighting, or several repairs across one wall may make painting a larger wall or ceiling plane the more consistent option. Confirm whether primer, spot painting, or broader painting is part of the estimate.
Drywall repair after a plumbing leak
When access openings were created because of a leak, the plumbing source should be corrected and the assembly should be ready to close before reconstruction. Soft, sagging, repeatedly wet, or otherwise deteriorated drywall may require removal beyond the original access cut. Review the water-damaged drywall guide before treating the project as a cosmetic patch.
Why photos and dimensions help
Clear photos and approximate measurements help organize the likely scope, especially when several openings are involved. Include a close view and a wider room view for each area, note whether the opening is on a wall or ceiling, identify the room, and show nearby corners, trim, cabinets, or fixtures. Also note the existing texture, ceiling height, whether insulation is present, and whether plumbing work is complete.
Photos can support an initial review but may not reveal moisture, backing, edge condition, or every finish requirement. The number of openings, accessibility, support, texture, protection, cleanup, and painting all affect drywall repair cost.
Plan the drywall scope after plumbing work
Use the broader drywall repair guide to compare wall, ceiling, water, texture, and replacement considerations. If contractor help is appropriate, provide the opening count, dimensions, rooms, photos, plumbing status, texture, and desired paint scope.